I’ve been meaning to make this recipe for a while now since it’s one of my favorite appetizers to get at Japanese restaurants as well as from street vendors whenever I visit Japan. Though, with takoyaki requiring special equipment to make, I was putting it off. But with us being a bit adventurous this month, I thought it made most sense to make it now!
Takoyaki, consisting of the words for octopus, tako, and grilling, yaki, was created in the 20th century by street vendors in Osaka, Japan. Instantly becoming a great hit, takoyaki’s fame stretched across the Kansai region, including Kyoto and Nara, and later spread to the Kanto region, including the capital of Tokyo, where it quickly spread throughout the rest of Japan. And now, today, takoyaki is a nationwide favorite sold at restaurants, mobile food stalls, and even convenience stores all across Japan.
If you’ve never had takoyaki before, it’s quite a unique dish, with a crispy exterior and slightly custard-like interior that is a great mix of seafoody, savory, richness, with a slight sweetness from the sauces, as well as a nice bite of freshness from the green onions. This combination of flavors make this dish a great snack to enjoy while walking around in Japan, especially during the summertime when food stalls and festivals are plentiful.
The takoyaki pan is an important piece of equipment needed to make the iconic spherical shape of the takoyaki, which you can find at most Asian grocery stores or online, of course. I recommend getting a cast iron version of the pan since it’ll make cooking everything without anything sticking to the pan a lot easier. But, like with a normal cast iron pan, you’ll need to take care of it properly. You can also get an all-in-one electric takoyaki pan, but I don’t really like having a bunch of one-use appliances cluttering up my already well-stocked kitchen, but it’s up to you. With this pan, you can make takoyaki, as well as a bunch of other spherical foods that are made with batter, such as pancake balls, cake pops, and even pizza balls.
With Osaka being next to the ocean, octopus is a common ingredient in many dishes, but if you’re not a fan of seafood, you can easily substitute this with other protein such as beef or chicken or even some cheese. Though, of course, it wouldn’t really be “tako”-yaki anymore without the octopus. But, I think the novelty of eating spherical food is well worth the effort of using this pan.
Speaking of substitutes, if you don’t have any okonomiyaki sauce, you can make it at home by mixing some ketchup with some worcestershire sauce and soy sauce. I recommend adding this sauce as well as the other toppings I mentioned, as these add a nice savory and sweet, rich flavor that really elevates the flavors of the crispy takoyaki. Though, the original version of takoyaki doesn’t contain these more luxurious ingredients, so if you just want to enjoy the takoyaki without these, you can.
But regardless of if you just make the takoyaki itself, or dress it up with all of the toppings, this quick-to-make spherical snack is a delicious and easy way to travel to Japan and enjoy the food there without the cost of an expensive plane ticket and with the added benefit of no jet lag.
Ingredients:
- Some Takoyaki batter (which you can buy prepackaged) or if you want to make it from scratch, you will need:
- 1/2 cup or so flour
- 1 Egg
- 1 cup water
- 1/2 tsp dashi powder (or other instant soup powder)
- 1 tsp soy sauce
- Filling:
- Some neutral oil to keep things from sticking
- Some octopus (if using uncooked octopus you will also need some water and salt to boil it)
- 3-4 green onions/scallions
- 1 tbsp or so pickled ginger (optional)
- 1 tbsp Tenkasu (tempura crumbs) or Panko bread crumbs (optional texture)
- Garnishing:
- Some Kewpie mayonnaise
- Some okonomiyaki sauce
- Some green onions
- Some pickled ginger
- Some Bonito flakes
- Some shredded nori
Special Equipment:
- Takoyaki pan
- Some chopsticks or a takoyaki pin stick to maneuver the batter while it cooks
- A brush for brushing the pan with oil
Step 1: Prepare Batter & Filling Ingredients
First, we’ve got to precook the octopus. So, if you need to cook yours, bring a pot of salted water to boil.
And while we wait for that, we’ll prepare the rest of the ingredients, so for your batter, in a large bowl, add in your flour, egg, water, dashi powder, and soy sauce and whisk this until the batter is smooth and lump-free.
Then, for your green onions and pickled ginger, slice these up into thin pieces. Once your water is done boiling, place your octopus in and cook it for a couple of minutes, until the skin starts to change color. We will continue to cook it when we make the takoyaki, so don’t overcook it.
Then, once the octopus is done, cut the cooked octopus into small pieces.
Step 2: Heat Up & Oil Takoyaki Pan, Pour Batter into Cavities, Add Filling Ingredients, & Cook for 3 Minutes or Until Batter Starts to Set
When all of your ingredients are ready, we can begin to make the takoyaki, so heat up your takoyaki pan on high heat, and then once it becomes hot, reduce it to medium.
Generously brush each of the holes and surrounding surface with your oil. Then, once the oil is heated, pour your batter into each of the cavities. It’s ok if some of it spills out since we’ll be adding more things that will cause it to overflow anyway.
Speaking of, evenly cover the batter with your prepared green onions and pickled ginger, setting aside some of each for garnishing later, if desired. Then, add your tenkasu or panko bread crumbs, if using. And then for each cavity, add in 2-3 pieces each of your cooked octopus, pushing them into the batter somewhat.
Then, let this cook for about 3 minutes or so, or until the batter starts to set on the bottom. And if needed, rotate the pan every so often to ensure even cooking.
Step 3: Trace Out Each Takoyaki Section, Roll Each Hemisphere Halfway, Then Continue Rolling & Stuffing Excess Batter into Cavities
Then, once the batter starts to cook, take your chopstick or pin stick and trace out each section of your takoyaki pan to divide the batter and toppings into 16 sections (or however many holes your pan has).
Then, using the same stick, carefully roll each hemisphere about halfway toward the bottom of the pan, stuffing the connected dough back into the ball as you turn. Don’t worry if you mess up if this is your first time doing this, just try to stuff any excess pieces sticking out of the hemisphere cavities so that we’ll have completely round takoyaki at the end.
Also, if your takoyaki is starting to burn, turn down your heat, so you have more time to rotate everything.
Then, once all of your takoyaki are halfway turned, continue turning them all until they are fully flipped over, continue to stuff any excess batter into the cavities.
Then, cook this for another 5-8 minutes, rotating each ball every so often to ensure everything cooks evenly, until all of the takoyaki are completely golden brown.
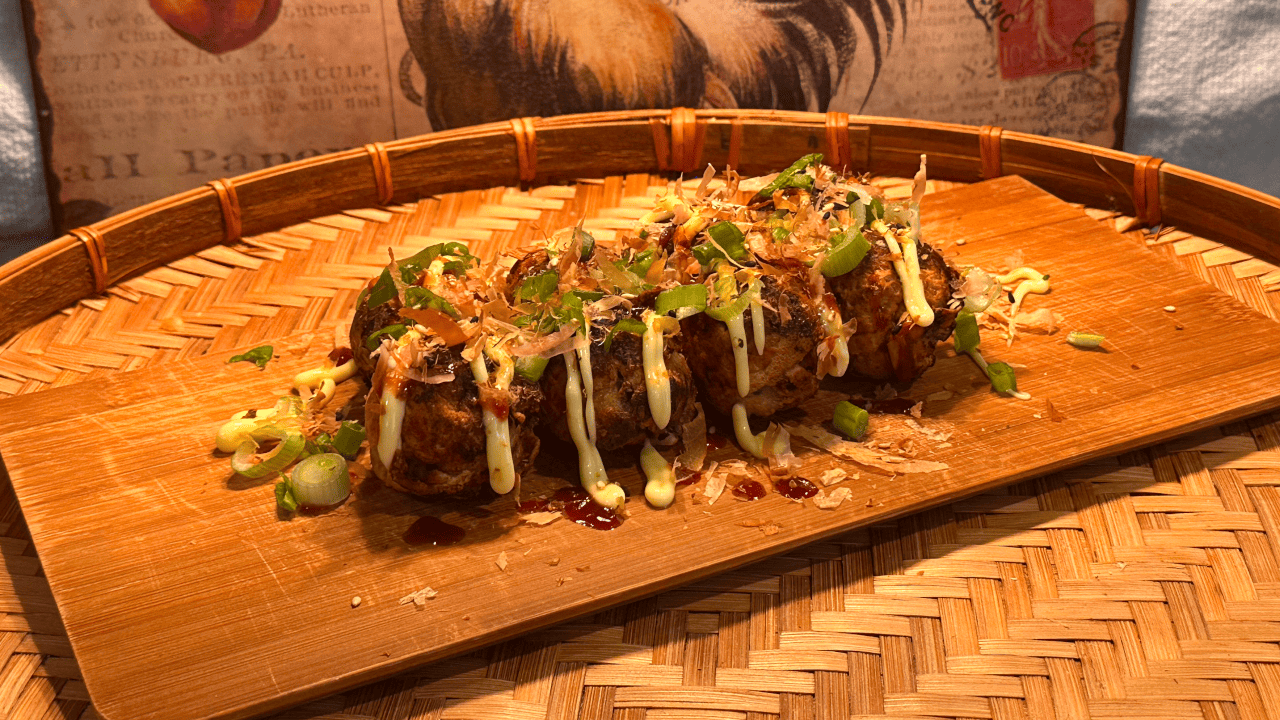
Step 4: Remove to Serving Plate, Garnish Immediately, & Enjoy!
Once your takoyaki are done to your liking, transfer them to a serving plate and immediately garnish with Kewpie mayonnaise, okonomiyaki sauce, green onions, pickled ginger, Bonito flakes, and/or shredded nori, if desired, and with that, your Takoyaki are ready to eat.